Update 2010.03: Deti has found a way modify the image enough to start a “service” menu. See his thread, he explains this and much more (german thread)
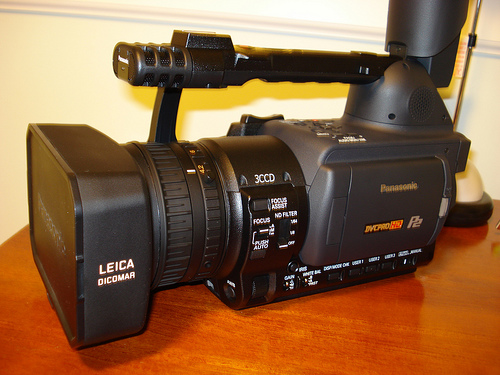
This is a semi-professional HD video camera that sells for -5000. Regardless if you have this camera or not the methods discussed herein should encourage you to pull apart any device you have. Even with such a pricetag the hardware and software of the device are rather comprehensible, in some cases laughably so. In such cases I’m not laughing at Panasonic but rather at myself for thinking that this would be more complicated. That is the objective of this tutorial, to help the reader realize that, if nothing else, the initial stage of diving in is easy and fun.
The camera is popular with independent producers but has its areas that could be improved. The camera runs a Montavista Linux operating system on top a SuperH SH4 subtype SH7751 CPU. Storing of HD video is done using “Panasonic P2” cards. These appear to be PCMCIA cards with flash chips and a RAID controller which greatly increase data writing speeds. There are many improvements that a homebrew system could bring to this camera. As an example of some low hanging fruit: Adding support for offloading video from the P2 card in the camera to an external disk using either a usb or firewire controller. While there are other modifications that come to mind this would let someone use a single P2 card to record endless amounts of video instead of paying for a mountain of expensive P2 cards. Another would be dissection of the P2 card and replacing the flash chips of a cheap 4GB card to increase the size to 64GB?
INDEX
- Obtaining Firmware
- Firmware Dissection
- Hardware Overview
- Target List Assessment
- Obtaining Debug Console
- Developing Software For Camera
- Modifying Firmware
- …
- Modification wishlist
1. Obtaining Firmware
There are a few routes to obtain the firmware, in order of difficulty:
[A] obtain a manufacturers firmware update and hope that it contains a system image,
[B] use the debug mechanism and ports (Serial, Network and TFTP, JTAG?) to download the running system image from internal FLASH,
[C] desolder the FLASH or ROM memory chips found inside the target and dump the contents with a compatible memory programmer
In the case of the Panasonic HVX200 the firmware updates contain an entire image of the system and can be obtained from the Panasonic website (ref2). Important: the version I am working with is v4.06-00-0.00 (aka version “vsi4598g”) which can be downloaded directly from panasonic or found in the project working directory.
1.1. Decompressing Firmware Updates
Update: A shorter method for decompressing firmware is… just untar and unzip the update file with “tar -zxvf <updatefile>”. I will retain the old direction because it’s useful knowledge for other projects/targets you might run into.
The firmware update is compressed. I use a program called STUNS which searches the file attempting to decompress any block of data using various compression routines. The developers website has since gone offline but I’ve placed a copy with the source code and compiled version for windows in the project working directory. Execute the program on the compressed firmware. Upon completion you will find directories created for each type of compression and inside are thousands of files for each block it attempted to decompress. The largest block is the winner. In the case of the HVX the firmware is compressed with the deflate compression routine. I’ve placed a copy of the uncompressed version in the project working directory. Even in this state you can already open the file in a Hex editor or run it through `strings` to find a wealth of information.
2. Firmware Dissection
2.1. Basic Examination of Strings
SH IPL+g version 0.9, Copyright (C) 2000 Free Software Foundation, Inc.Looking at the strings of the decompressed firmware it should stand out that this is a Linux system and that the image contains several filesystems. Before pulling the file systems out lets just look at the strings to see what we can determine.
That is the bootloader version information. “It is an Initial Program Loader(IPL) of many SH-based systems booting Linux kernel. It functions as gdb-stub to provide the way to communicate with GNU gdb debugger. Also, it acts as a BIOS of the system.” (ref1, ref2)
# CONFIG_CPU_SUBTYPE_SH7300 is not set
# CONFIG_CPU_SUBTYPE_SH7707 is not set
# CONFIG_CPU_SUBTYPE_SH7708 is not set
# CONFIG_CPU_SUBTYPE_SH7709 is not set
# CONFIG_CPU_SUBTYPE_SH7750 is not set
CONFIG_CPU_SUBTYPE_SH7751=y
# CONFIG_CPU_SUBTYPE_ST40STB1 is not set
# CONFIG_CPU_SH3 is not set
CONFIG_CPU_SH4=y
CONFIG_CPU_LITTLE_ENDIAN=y
# CONFIG_P2PF_K200 is not set
CONFIG_P2PF_K230=y
# CONFIG_P2PF_K250 is not set
CONFIG_P2PF_HW_VERSION=2
CONFIG_MEMORY_START=08000000
CONFIG_MEMORY_SIZE=04000000
CONFIG_MEMORY_SET=y
That is part of the configuration file for compiling a Linux kernel. It shows us that the CPU is a SuperH SH4 subtype SH7751. This family of CPUs are also used with Sega gamesystems and some PayTV Set Top Boxes.
Linux version 2.4.20_mvl31-ms7751rse01-sh_sh4_le (root@rx7)
(gcc version 3.3.1 (MontaVista 3.3.1-7.0.42.0600552 2006-04-30))
#13 Thu Mar 22 19:28:14 JST 2007
That show that the camera is running a 2.4.20 linux kernel compiled with gcc version 3.3.1. We also see the version of MontaVista linux being used. These details are important because if we ever want to compile our own software for this system we will need to setup, at a minimum, an environment that includes the Linux 2.4.20 headers, the version of glibc being used in this MontaVista version and a gcc 3.3.1 crosscompiler for SH4 platforms (or crosstoll.)
description=NetChip 2280 USB Peripheral ControllerThat string is part of the net2280.o kernel module and indicates the USB driver. This already gives some promise to obtaining our objective of supporting an external USB disk. Though we would still need to find USB host drivers somewhere. It is important to determine which drivers are already available because if we have to add and compile additional drivers we will likely need more than just the Linux headers, glibc and compatible gcc version. We would perhaps need the entire MontaVista development kit so that we could both compile the driver and add support to the kernel for the driver, meaning perhaps we even have to recompile the entire kernel. Yuk.
7791c147ef8f33e7c9844d20992e4fd8  netboot-1st.binary
9004619ae34aad3bbbc7cca53e3b7444  netboot1.binary
21910d91dcbae05a0688acce08ef86df  netboot2.binary
e0be87ce4e9c70deddb828a17f931488  vmlinux.bin
cedfadc76e06cca69602424d3a277a39  rootfs.image
b21555e3f845831d455d9f679277ac57  home.image
e9a74405904af1544bdfe5cb1363858b  vmlinux-vup.bin
f5fcfa007950817cca499da3ae13bf53  ramdisk.gz
c003003dc8b8abbb3e3c11367530d454  vup.sh
51ffed17a3b940c6ad5b7ca727a8d259  vup2.sh
df7e7b23160729e90add6b437db2b278  tx.bin
f1d3ff8443297732862df21dc4e57262  txvups.bin
a54f0041a9e15b050f25c463f1db7449  txvupe.bin
d9a885fc28e4f61d3268fea6ccb7be09  txvup.sh
Those strings appears at the very end of the uncompressed firmware image and indicates the various parts of the image. We also find tons of scripts in in the file but it would be nice to map these to their filenames.
2.2. Mounting Firmware Filesystem
There are a few images/filesystems contained internally in the uncompressed firmware. I made a lucky guess that these were CramFS images. If this was not the case, to determine what type of filesystem for the internal image we would use a program that attempts to match “magic” strings (mime/type, magic/type databases) to bytes in the raw firmware images, by searching over the file looking for matches. At the moment I do not remember the name for such a program but contact me if you need this for other projects.
Confirmation of a CramFS image came in the form of these strings found in the firmware image:

The 4 bytes (in reverse endianness) at 00632600 also indicate a CramFS filesystem as proven by the Linux cramfs_fs.h header file:
/*
 * Superblock information at the beginning of the FS.
 */
struct cramfs_super {
 u32 magic; /* 0x28cd3d45 - random number */
 u32 size; /* length in bytes */
 u32 flags; /* feature flags */
 u32 future; /* reserved for future use */
 u8 signature[16]; /* "Compressed ROMFS" */
 struct cramfs_info fsid; /* unique filesystem info */
 u8 name[16]; /* user-defined name */
 struct cramfs_inode root; /* root inode data */
};

From this we can guess that the first is the rootfs.image and the second the home.image referenced at the end of the uncompressed firmware.
2.3. Panasonic Specific Drivers and Software in Firmware – Targets
Now that we have the filesystem I’d like to both start compiling a list of targets (software to be reverse engineered) and to better understand the internal hardware and functional components. This requires some familiarity with linux systems so that you can deduce what is common to basic linux systems and what is specifically added by Panasonic. Lets start walking through it.
2.3.1. first_cramfs_image_toEOF.mount (rootfs.image)
2.3.1.1 /dev/
The device handles that are new to me here are /dev/rt, /dev/vcs and /dev/vcsa. /dev/rt is still a mystery for me but the vcs and vcsa devices are Virtual Console Capture devices (according to a common linux device list). From the Linux Cookbook (ref2):
“If the target console is the first virtual console (which you would see by typing [ALT]-[F1]), the device to cat is `/dev/vcs1′. To take a screen shot of the fourth virtual console, and save it to a file called `screenshot’, type:
$ cat /dev/vcs4 > screenshot [RET]
In order to re-display the screenshot just paste it back into a free virtual console, type:
$ cat screenshot > /dev/vcs4 [RET]“
Hence, we might be able to use this for debugging, provided we find some way of grabbing the screencapture file. Then again, maybe just setting up a serial terminal is going to be easier.
2.3.1.2 /etc/init.d/
This directory commonly contains the startup scripts for a linux system that are used to start services that will run in the background while the system is up, load drivers and enable devices. When examining these files I will only include excerpts from the scripts.
/etc/init.d/pcmcia:
# Panasonic P2 original pcmcia script 2004/07/30
. /lib/modules/`uname -r`/pcmcia-config/pcmcia
    action=
    case "$action" in
    start)
	/sbin/modprobe pcmcia_core
	/sbin/modprobe i82365 irq_mode=0
	/sbin/modprobe ds
	/sbin/modprobe cb_enabler
 /sbin/modprobe spd_mod > /dev/null 2>&1 	/sbin/cardmgr -q -c /lib/modules/`uname -r`/pcmcia-config
	touch /var/lock/subsys/pcmcia
	EXITCODE=0
	;;
All of the modules loaded with this script are common except for spd_mod. i82365 indicates that we are using a Intel i82365sl PCMCIA host controller (there are many clones, ref1). Let’s examine briefly the strings in ./first_cramfs_img_toEOF.mount/lib/modules/2.4.20_mvl31-ms7751rse01-sh_sh4_le/pcmcia/spd_mod.o.
./first_cramfs_img_toEOF.mount/lib/modules/2.4.20_mvl31-ms7751rse01-sh_sh4_le/pcmcia/spd_mod.o:
[spd]2.4.1.61(K230)
<3>[spd]4:%s:%d:R5C812 on Unkown
<3>[spd]4:%s:%d:R5C812 on WRITE
<3>[spd]4:%s:%d:R5C812 on READ
spdu
<3>[spd]4:%s:%d:register_chrdev() failed(%d)
spd_udev.c
<3>[spd]4:%s:%d:invalid minor number(%d)
<3>[spd]4:%s:%d:unknown ioctl command(%d)
<3>[spd]4:%s:%d:copy_to_user() failed(%d)
<3>[spd]4:%s:%d:spd_identify_device() failed(%d)
<3>[spd]4:%s:%d:copy_form_user() failed(%d)
<3>[spd]4:%s:%d:spd_read_sector() failed(%d)
<3>[spd]4:%s:%d:udev_make_sg() failed(%d)
<3>[spd]4:%s:%d:spd_write_sector() failed(%d)
<3>[spd]4:%s:%d:spd_log_sense() failed(%d)
<3>[spd]4:%s:%d:spd_log_write() failed(%d)
<3>[spd]4:%s:%d:spd_block_erase() failed(%d)
<3>[spd]4:%s:%d:spd_sector_erase() failed(%d)
<1>[spd]2:%s:%d:ALERT:P2card firmware size 61h only but size=%02xh <3>[spd]4:%s:%d:spd_firm_update() failed(%d)
<3>[spd]4:%s:%d:scatterlist overflow(%d)
<3>[spd]4:%s:%d:spd_read_capacity() failed(%d)
It is obvious from the various symbols found that this driver is used for writing to some form of memory card. We also find two important strings, “ALERT:P2card” which indicates that this driver is specific to the P2 card and “R5C812“. R5C812 indicates that we have a PCMCIA controller from Rocah, in particular the model which supports two PCMCIA/PCcard slots, such is the case on the HVX200. Examination of the product sheet confirms that this device is also used to control the SD card slot of the camera. We can put this driver into a list of potentially high value targets. With a file size of 98KB and the wonderful gift of a symbol table left in this might not be so dificult to analyze.
/etc/init.d/StartUp_Cam.sh:
### execute application for MontaVista Linux Pro. 3.1
##   by Panasonic
#########################
# preload drivers       #
# set environment value #
#########################
. /etc/p2pfenv
ulimit -c 0
#####################
# application start #
#####################
cd /var
/home/apli/sg &
A look at the /etc/p2pfenv script shows that it preloads a driver for the SD card but also gives another possible target in its comments where a module that enables a character driver of the camera is commented out (scullp.o – see “Simple Character Utility for Loading Localities”). This is the mode the camera is put into when plugged up to a PC for offloading video (see ‘home/apli/ua-load.sh‘). Herein we might find code for both reading the P2 card filesystem and setting up as a USB client.
/etc/p2pfenv:
###################
# preload drivers #
###################
insmod /lib/modules/2.4.20_mvl31-ms7751rse01-sh_sh4_le/kernel/drivers/sdcard/sdcard.o \
> /dev/null 2>&1
#use only PC mode
#insmod /home/usb/scullp.o > /dev/null 2>&1
In scullp.o we have strings which indicate the developers login name and the project name in addition to plenty of symbols that confirm that this can access and control the P2 card (not shown here) so lets add scullp.o to our list of Panasonic specific targets:
../../../../src/contrib/K230_Kernel/include/linux
../../../../src/contrib/K230_Kernel/include/asm
/opt/montavista/pro/devkit/sh/sh4_le/lib/gcc-lib/sh4-hardhat-linux/3.3.1/include
../../../../src/contrib/K230_Kernel/include/linux/sunrpc
../../../../src/contrib/K230_Kernel/include/p2
../../../../src/contrib/K230_Kernel/include/asm-generic
/home/tanaka/work/K230/myapplication/p2pf/src/driver/usb/buffer
StarUp_Cam.sh also executes .//second_cramfs_img_toEOF.mount/apli/sg. When examining this file we get a load of other targets:
ZION VGA Initialize(NTSC) Success!!
ROM VERSION AREA INITIALIZE ERROR
/home/apli/pm
Create UM
/home/apli/sm
PID[SG_CHILD_PROC_SM] = %d
Create SM
/home/apli/mm
/home/apli/nano-X
nano-X
createSV::arg error eSgStatuse=%d
/home/apli/ext_prgrm.sh
ext_prgrm.sh
execl[EXT] error(%s)
/usr/local/bin/vup-start.sh
vup-start.sh
execl[VUP] error(%s)
/dev/fb0
libev.so
liblg.so
LGInit
libsc.so
libsg.so
liblb.so
libsp.so
libro.so
libm.so.6
GLIBCPP_3.2
GLIBCPP_3.2.3
CXXABI_1.2
GCC_3.0
GLIBC_2.2
…
… to be continued

Leave a comment